Documentation
- Version: 1.0
- Author: Team bookster
- Created: 14 September, 2023
- Update: 22 Juanary, 2024
Explore bookster and discover how it can optimize your booking management effectively.
bookster is a sophisticated software solution specifically designed to simplify and streamline booking management. Any seasoned professional knows that handling bookings alone can quickly become complex. Our mission is to streamline your workflow and keep all stakeholders informed by bringing them together on a centralized platform.
The founding idea of bookster dates back to 2023, with the vision of facilitating booking management through powerful software. We have created a dedicated environment, allowing artists and their agencies to focus on what matters most.
bookster's objective is clear: we aim to assist you in simplifying your work as an artist or manager. We eliminate accidental errors related to booking management by providing you with an organized and ready-to-use space. In the demanding and competitive world of music, entrusting us with your administrative tasks allows you to channel your energy into your current and future projects with the determination they deserve.
Choose the right plan
Our plans are meticulously designed with a focus on user flexibility. Team members, considered key users, will be responsible for booking management and have full access to all modules, providing complete visibility into the activities. It's worth noting that these members are not limited to simply creating bookings; they can also validate them.
Each plan offers the freedom to have an unlimited number of agents, facilitating smooth and efficient collaboration. Furthermore, all our plans empower you to manage an unlimited number of bookings and artists, offering a scalable solution tailored to your needs.
Currently, our plans are available as monthly or yearly subscriptions, with secure payments processed through the Stripe application.


If you find yourself in a dilemma, feel free to reach out to us via our support chat or by email. We're here to guide you toward the ideal solution for optimizing your booking management.
If your plan expires, you won't be able to access the Bookster application. You'll need to update your account to a new plan.
Account creation
When you select your plan on the Bookster website, you will be prompted to create your account by providing your first name, last name, the name of your company or booking agency, or your artist name if you are an independent artist. Next, you will be asked to specify the default currency used for displaying financial statistics, as well as your email and password.
Once validated, you will be redirected to a page asking you to confirm your email. After confirming your email through a clickable link that you will receive by email, you will be prompted to confirm the previously selected plan, and you can also choose a different plan at this stage.


You will then be redirected to a payment page hosted by the Stripe application.
Once the payment is completed, you will be redirected to the Bookster application dashboard.
Subsequently, you will have the option to either upgrade your account to a higher plan or downgrade it. Simply click on the "Plan" option located under your email in the left sidebar of the application or on your company page under the "Subscriptions" tab and then "Manage your plan here".
You also have the option to manage your subscription on the financial level by visiting the dedicated page on the Stripe application. To access it, simply click on the name of your plan, highlighted in bold, under your email address in the left sidebar of the application.
Alternatively, you can access it directly via the link : Stripe
First step
During your first connection to the application, you will go through an integration process, which is a 6-step tutorial to complete before being able to create booking.
-
Set up your company's information (Change your personal settings):
- You will need to add information such as the address, city, postal code, country, as well as the type of company, capital, your SIREN and SIRET, and VAT number.
- Add banking information; you can create as many banks as necessary.
- Add a logo and a logo for documents such as invoices and contracts.
This information is necessary for invoice creation.
-
Configure SMTP mailing (SMTP server settings):
- Add your SMTP information to send invoices and contracts via email.
- You can modify email templates for sending contracts and invoices.
-
Add one or more artists (Create or import artists):
-
Add one or more contacts (Create or import contacts):
-
Add a contract template (Create a contract template):
-
Create a booking (Create a booking):
If your company and SMTP information are not provided, you will receive two alert messages on your dashboard.

Personal settings
Change your personal settings
Learn how to add or change your name, phone number, email and password...
-
Click on your personal icon (initials of your full name or email you've chosen) located in the top right corner.

- Click on the "My Account" button, which will redirect you to your user account page, then press the "Edit" button to update your information or press the "Edit Password" button to update your password.
- Adjust the settings to your preference and proceed by clicking the 'Validate' button.
Reset your password
Learn how to reset your password when you can't recall or have forgotten it.
- While on bookster and attempting to log in, click on the 'Forgot your password ?' button.
- Enter the email address you used to create your account and click the 'Send' button.
- Check your email for the message from Bookster titled: 'Password Reset'. Click the link or copy the URL at the bottom of the email and paste it into your web browser.
Note: If you don't see the email, please check your spam folder and ensure that noreply@bookster.fr is whitelisted in your contacts.
- A new dialogue will appear; enter your new desired password and confirm it by typing it a second time.
Your password has now been successfully reset.
Delete your account
Learn how to reset your password when you can't recall or have forgotten it.
-
Click on your personal icon (initials of your full name or email you've chosen) located in the top right corner.
- Click on the "Settings" button, which will redirect you to your settings page.
-
Click the button 'Delete' and confirm the pop-up by pressing 'Confirm'.

Note: Deleting your account is irreversible and cannot be undone. A confirmation email will be sent to you, including steps to ensure the termination of any recurring subscription via the Stripe application. Please follow these steps to complete the process.
Company settings
Change your company settings
Learn how to add or change your company name, phone number, logo, email and password...
-
Click on your personal icon (initials of your full name or email you've chosen) located in the top right corner.
- Click on the "My Company" button, which will redirect you to your company account page, then press the "Edit" button to update your information to update your password.
Note: Information such as the Name, email, full address, SIREN, and VAT number, as well as logos, is necessary for the proper functioning of the application.
- Adjust the settings to your preference and proceed by clicking the 'Validate' button.
Add or update your company bank account
Learn how to add or update your company bank account
- On your company page, navigate to the 'Bank' tab, which is selected by default, and click the "Create Bank" button to establish a new bank.
- You will be redirected to a form page prompting you to fill in a set of fields related to your bank account.
- Adjust and proceed by clicking the 'Validate' button.
- To update a created bank, simply click the "Edit" button in the list of banks.
Note: You can create as many bank accounts as you need.
SMTP server settings
Learn how to add or modify your SMTP settings and customize mail templates.
Note: Configuring your SMTP account is crucial for sending invoices and contracts via email, and it is a vital step for the proper functioning of the application.
Email SMTP server Setup
-
Click on your personal icon (initials of your full name or email you've chosen) located in the top right corner.
- Click on the "Email SMTP setup" button, which will redirect you to your SMTP Email setup page.
- On the left-hand side, you will find a form for configuring your SMTP account. Once the information is entered, click the "Validate" button.
- Ensure that no errors were made by testing your information and the configured SMTP server. To do this, click the "Test Server Availability" button. A pop-up message will appear on the screen to inform you if your configuration is valid.
Send emails with Gmail SMTP server
Note: You will need to enable two-factor authentication on your Gmail account to access this functionality.
-
Enter smtp.gmail.com as the server address. In the Port field, enter one of the following numbers:
- For SSL, enter 465.
- For TLS, enter 587.
- For authentication, enter your full Google Workspace email address (e.g., your.name@gmail.com) along with your password. Make sure to sign in to the account before using it on the device or in the application.
-
Set up your SMTP password Gmail :
- Go to your Google Account and choose Security on the left panel.
- On the Signing in to Google tab, select App Passwords.
-
On the Signing in to Google tab, select App Passwords.
If you don’t see this option, it might mean that:
- Two-step verification is not set up for your Google account.
- Two-step verification is set up for security keys only.
- Your account is used through work, school, or another organization.
- You’ve turned on Advanced Protection for your account.
- Click on Select app and pick the app you’re using.
- Click Select device and choose the device you’re using.
- Click on Generate.
- Follow the instructions to enter the App Password.
- Click on Done.

Configuring email templates
- On the right side, you will find two forms for configuring your email templates: one for the invoice sending template and another for the contract sending template.
- These two forms will be pre-filled with default text.
- Note: Please note that in the contract sending email template form, there is a placeholder "[[LINK]]". Kindly leave this placeholder in the body of your email template, as it will be used to add the link for signing the contract.
- Press the "Validate" button to save your modifications.

General
Documentation and examples for navbar, sidebar, content
Basic Navigation
The navigation within the application is straightforward, with a top navbar, a left sidebar, and the application content in the center of your screen.
Navbar
The navbar features, from left to right:

- The application logo for bookster.
- A button to collapse or expand the left sidebar.
- A search bar.
- A button to toggle between dark and light modes.
- A button to toggle full-screen mode for the application.
-
Your username and email. Clicking on it reveals a dropdown button, providing access to various configuration pages.
Content
The application content is located in the center of the screen.
List
Each list contains a search field that allows you to search for the entered word in all columns of the list. You can also modify the number of rows displayed, navigate through different pages using pagination buttons, and sort columns by clicking on the small arrows next to their names.
Generally, at the end of the line, you will find the "Action" column, which allows you to take various actions on the different objects.
Modules
Documentation and examples for all modules
Dashboard
Learn the basics of the Bookster application dashboard
The dashboard serves as your starting point to view upcoming events and their related information, along with other reports. Here's a summary of what you can find:
-
The count of entities you have created (Artist, Contact, Location, Event, Invoice, and Contract).

-
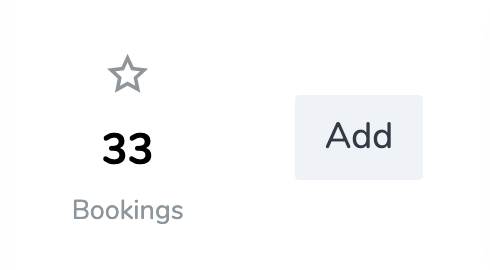
The number of bookings created, with a "Add" button for quick access to the booking creation page.
-
Financial information includes your company's revenue generated on Bookster, as well as the overall earnings of artists and the fee amounts, which you can choose to hide or display.

-
A list of upcoming bookings.

-
The calendar, allowing you to quickly create events related to the calendar or bookings (Calendar - create a booking).

- A list of contracts awaiting signatures.
- A list of invoices awaiting payment.
Booking
The Booking module is the cornerstone of the application, all other modules revolve around it.
To create and confirm a booking, you must first create at least one artist (Create an artist), one contact (Create a contact), a bank account for your company (Add or update your company bank account) or an artist (Create or update an artist bank account), and a contract template (Create a contract template).
Events, locations, fees, and documents can be configured on the fly directly within the booking.
Users and agents with the necessary permissions can create a booking.
A booking can include multiple sessions with several artists, known as a multi-booking.
Create a booking
To access the Booking module, click on the "Booking" tab located on the left sidebar under the "Manage" section.
You will be redirected to a page displaying a list of your bookings in list format.
On this list, each line has one or more child lines corresponding to the details of the booking. When there are multiple lines, it indicates that it's a multi-booking.

Above the list, you will find one button for adding a booking, which redirects you to a creation form.
Once on the booking creation form, you will notice several blocks on the page.
The first time you create a booking, you will have a popup tutorial guiding you through the steps.
These steps are represented in the block at the top right of your screen, consisting of 5 steps:

Each time you complete a step, it will be checked off in the steps block. Once all 5 steps are completed, your booking will be well-configured.
You will also find a block containing some information about the booking, such as its reference, the author, and the workflow status of the booking.

This status indicates to users, artists, and agents whether the booking has been confirmed; however, it doesn't necessarily mean that the booking is completed.
For the booking to be completed, the invoice associated with the booking must be paid, and a contract must be signed.
Here are the different workflow statuses:
- To be confirmed
- Option
- Confirmed
- Canceled
And the different global statuses:
- In progress
- Option
- Completed
Next, you will need to either add a previously created event or create one directly on the booking page, the same goes for the locations.
Once the event and location are created, you can create the booking details, which correspond to the session. You will need to specify a start and end date, an artist, a location, and a contact.

You can now create a contract and an invoice.
As long as the contract is not signed and the invoice is not paid, the global status of the booking will remain "In progress."
If an action is taken on either of the two documents, the status will change to "Option."
Once the contract is signed and the invoice is paid, the status will change to "Completed."
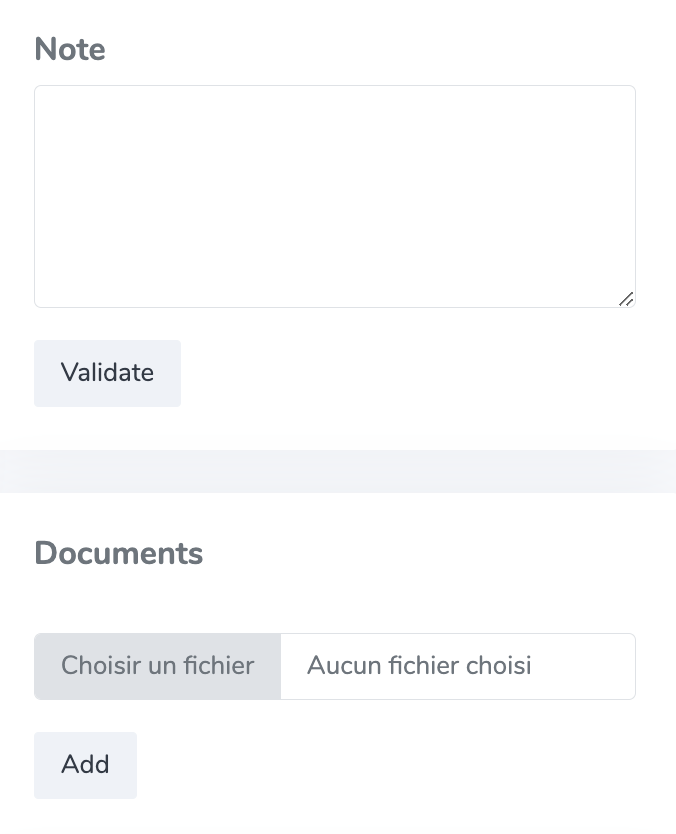
You can add a note and documents to your booking, as well as additional fees.
Finally, at the bottom left, you will find a financial summary table.

For greater ease of use, we recommend creating a booking via the calendar.
However, to add a contract and an invoice, you will need to either use the contract and invoice modules or go to the page of a specific booking.
Once your booking is created, it will appear on the calendar (Calendar).
Booking page
To access the Booking module, click on the "Booking" tab located on the left sidebar under the "Manage" section.
You will be redirected to a page displaying a list of your bookings in list format.
On this list, each line has one or more child lines corresponding to the details of the booking. When there are multiple lines, it indicates that it's a multi-booking.
Above the list, you will find one button for adding a booking, which redirects you to a creation form.
Once on the booking creation form, you will notice several blocks on the page.
On this page, which corresponds to the booking creation page (Create booking), you will find a set of blocks:
- Global booking information with workflow status
- Booking configuration steps
- Form for creating or providing information about the event for the booking
- Form or map for the location
- List or form for booking details
- Text field for notes
- List or form for creating a contract
- List or form for creating an invoice
- List or form for creating a fee
- List of documents and add button
- Financial report table
Confirmed and completed a booking
To confirm and complete a booking, simply go to the booking page.
In the first block, you will find a selectable field that allows you to change the workflow status of the booking.
To complete a booking, you need to have a signed contract and a paid invoice linked to the booking.
You can confirm a booking directly through the calendar. (Show booking and update the booking workflow status.)
Calendar
Calendar page
To access the Calendar module, click on the "Calendar" tab located on the left sidebar under the "Manage" section.
The calendar is the central module of your application, providing a quick and clear overview of your bookings.
You can filter by artist, view by year, month, week, or day. Additionally, you can swiftly add note-type events or bookings to your calendar.

Note: Each event on the calendar displays the event name and the artist's name. For privacy reasons, we have not displayed the text in this example.
Each event is represented with a color on the calendar corresponding to the color of the booking's workflow status or the event note :
- Yellow : To be confirmed
- Blue : Option
- Green : Confirmed
- Red : Canceled
- Grey : Info Note
- Orange : Artist unavailable
You will also notice that on certain events, there is a small round badge in the upper-left corner.
This badge corresponds to the overall status of the booking. For a booking to be considered complete, both a signed contract and a paid invoice are required.
As soon as a booking is incomplete, a badge appears even if it has been confirmed.

If you click on the event in the calendar, a popup will appear with several details.
Create an event calendar
An event calendar is an informational note or notification of an artist's unavailability for other users or agents.
To create an event calendar, simply click on a date. A popup will open, prompting you to choose the type of event you want to create (Info, Unavailable or booking).
Select Info or Unavailable.
Then, select the artist for whom you want to create this event and provide the content, which will be in text format.

Create a booking
To create a booking, simply click on a date. A popup will open, prompting you to choose the type of event you want to create (Info, Unavailable or booking).
Select "Booking," and another popup will open containing a booking creation form.

During the booking creation, if you have multiple artists performing on the same night at the same event, you can add all the artists in the selection list. The software will handle the creation of a multi-booking.
Note: To create a booking, you must have previously created at least one artist and one contact; the event and the venue can be created on the fly.
Show booking and update the booking workflow status.
In the calendar, to view the information of a booking, simply click on it.
A popup with the details will appear, containing important information about the booking, such as the artist, event name, venue with a map, various files, and most importantly, an editable field containing the workflow status of the booking.
To update it, you only need to modify it via the selector.

Next to the date, you will see the overall status of the booking, indicating whether the booking is complete with a signed contract and a paid invoice.
To access the booking's profile, click on the event name in the popup.
Note: Only a user can confirm an event; agents cannot confirm an event or modify the workflow status of an event that is not theirs.
Provide an artist with access to another artist's calendar.
Please go to the artist's page and click on the "Send Calendar" button.

Note: If the email fails to send due to an error, don't worry. An alert with the link will appear, and you can choose to share it with your artist through any means you prefer.
The artist will only be able to view events assigned to them and will not have the ability to modify them under any circumstances.
Statistics
The Statistics module enables you to search, filter, and access a set of information, graphs, and reports related to your bookings.
To access the Statistics module, click on the "Statistics" tab located on the left sidebar under the "Manage" section.
You will be redirected to a page displaying a wealth of information, graphs, reports, lists, and most importantly, multiple search filters.

You can filter by date range, artist, user, as well as by agent, and these filters are combinable.
Once you have selected your search filters, press the loading button to the right of the filters.
The data will be displayed, and you will notice three tabs:

-
Results: Displays all reports, graphs, tables, and maps.
Note: At the bottom of this tab, you will find two buttons allowing you to export the list of invoices in bulk.
- Calendar: Shows a calendar relevant to the search filters.
- Lists: Lists of entities related to them, such as events, contracts, and invoices.
Artist
Create or import artists
To access the Artist module, click on the "Artist" tab located on the left sidebar under the "Team" section.
You will be redirected to a page displaying a list of your artists in block format.
Above the blocks, you will find two buttons: one for adding an artist, which redirects you to a creation form, and another for bulk importing a list of artists.

If you choose to import a list of artists in bulk, a popup will appear when you click the "Import" button.

It will prompt you to download a pre-filled Excel file that you need to complete with your artist's information.
Afterward, simply upload the filled file in the designated area within the popup and press the "Import" button to import your artists.
Update an artist
When you are on an artist's profile page, you will notice an "Edit" button in the top banner.
This button allows you to update the artist's information through a form.
Create or update an artist bank account
When you are on an artist's profile page, you will notice a "Create Bank" button in the top banner.
This button enables you to input the artist's bank account information via a form.
To modify an artist's bank account, while on their profile page, navigate to the "Bank" tab, which displays the list of registered bank accounts for the artist.
At the end of each line, there is a button that allows you to edit the bank account information.
Note: Artist bank accounts are used to generate invoices for the artist.
Artist page
To access the Artist module, click on the "Artist" tab located on the left sidebar under the "Team" section.
You will be redirected to a page displaying a list of your artists in block format.
Then click on the artist to access their profile. You'll find a banner with the artist's name and the person who created the profile, along with buttons (Edit, Create Bank, Delete).
Below, there are three tabs:

- Information: Displays details about the artist and their calendar, allowing you to directly add a booking.
- Bank: Shows the list of the artist's bank accounts.
- Stats & Lists: Provides financial statistics for the artist and a comprehensive list of entities related to them, such as events, contracts, and invoices.
Provide an artist with access to another artist's calendar.
Please go to the artist's page and click on the "Send Calendar" button.
Note: If the email fails to send due to an error, don't worry. An alert with the link will appear, and you can choose to share it with your artist through any means you prefer.
The artist will only be able to view events assigned to them and will not have the ability to modify them under any circumstances.
Contact
Contacts are typically the individuals with whom you will contract for a booking, commonly referred to as promoters if you manage DJs.
Please note that having a contact is mandatory to create both a booking, an invoice and a contract.
Create or import contacts
To access the Contact module, click on the "Contact" tab located on the left sidebar under the "Team" section.
You will be redirected to a page displaying a list of your contacts in list format.
Above the list, you will find two buttons: one for adding a contact, which redirects you to a creation form, and another for bulk importing a list of contacts.

If you choose to import a list of contacts in bulk, a popup will appear when you click the "Import" button.
It will prompt you to download a pre-filled Excel file that you need to complete with your contact's information.
Afterward, simply upload the filled file in the designated area within the popup and press the "Import" button to import your contacts.
Update a contact
When you are on a contact's profile page, you will notice an "Edit" button in the top banner.

This button allows you to update the contact's information through a form.
Contact page
To access the Contact module, click on the "Contact" tab located on the left sidebar under the "Team" section.
You will be redirected to a page displaying a list of your contacts in block format.
Then click on the contact to access their profile. You'll find a banner with the contact's name and the person who created the profile, along with buttons (Edit, Delete).
Below, there are three tabs:

- Information: Displays details about the contact and their calendar.
- Lists: Provides a comprehensive list of entities related to them, such as events, bookings, contracts, and invoices.
User
Users are typically individuals working for your company. If you are the person who has subscribed to a plan with bookster, then you are the administrator of your company. Other users are considered guest users. However, you can assign them as many rights as yourself. Guest users can create and update all entities within the application, as well as validate bookings.
You can create as many users as your plan allows.
Note : if a user wants access to another company on bookster as either a user or administrator, you will need to modify their email address since email addresses for users are unique in bookster.
Create a user
To access the User module, click on the "User" tab located on the left sidebar under the "Team" section.
You will be redirected to a page displaying a list of your users in block format.
Above the block, you will find one button for adding a user, which redirects you to a creation form.

When creating a user, you will need to set a default password for them
Don't worry, there's no need to communicate it via email. Once the account is created, an email is sent to the user, asking them to verify their email address and set their password.
Update a user
When you are on a user's profile page, you will notice an "Edit" button in the top banner.

This button allows you to update the user's information through a form.
Disabled or enabled a user
When you are on a user's profile page, you will notice a "Disabled" or "Enabled" button in the top banner.
This button allows you to enable or disable a user.
Disabling results in the user being unable to log in to the application.
Update passord of a user
When you are on a user's profile page, you will notice an "Edit password" button in the top banner.
This button allows you to update the user's information through a form.
User page
To access the User module, click on the "User" tab located on the left sidebar under the "Team" section.
You will be redirected to a page displaying a list of your user in block format.
Then click on the user to access their profile. You'll find a banner with the user's name, along with buttons (Disabled or Enabled, Edit, Edit Password, Delete).
Below, there are three tabs:

- About: Displays information about the user.
- Projects: Provides a comprehensive list of entities related to them, such as events, bookings, contracts, and invoices.
- Rights: Offers a detailed list of associated rights.
Configure user premissions
When you are on a user's profile page, you will notice a "Rights" tab under the banner.
This button allows you to add or remove the user's permission through a list with slide button.
In the list, you will see the description of the right, which is quite self-explanatory.
Simply click on the slide button to enable or disable the right for the user.
Agent
Agents are generally considered individuals working for you worldwide, finding events on your behalf.
An agent can access the calendar of your events and add events themselves; however, they cannot validate an event.
Only a user can validate an event. You can create an unlimited number of agents.
Create an agent
To access the Agent module, click on the "Agent" tab located on the left sidebar under the "Team" section.
You will be redirected to a page displaying a list of your agents in block format.
Above the block, you will find one button for adding an agent, which redirects you to a creation form.

When creating an agent, you will need to set a default password for them
Don't worry, there's no need to communicate it via email. Once the account is created, an email is sent to the agent, asking them to verify their email address and set their password.
When you create an agent, a company code will be assigned to them and communicated via email. Unlike users, an agent's email is not unique in bookster.
However, to determine the company an agent is associated with, they need to input the company code in the application login form.
Update an agent
When you are on an agent's profile page, you will notice an "Edit" button in the top banner.

This button allows you to update the agent's information through a form.
Disabled or enabled an agent
When you are on a agent's profile page, you will notice a "Disabled" or "Enabled" button in the top banner.
This button allows you to enable or disable an agent.
Disabling results in the agent being unable to log in to the application.
Update passord of an agent
When you are on a agent's profile page, you will notice an "Edit password" button in the top banner.
This button allows you to update the agent's information through a form.
Agent page
To access the Agent module, click on the "Agent" tab located on the left sidebar under the "Team" section.
You will be redirected to a page displaying a list of your agent in block format.
Then click on the agent to access their profile. You'll find a banner with the agent's name, along with buttons (Disabled or Enabled, Edit, Edit Password, Delete).
Below, there are three tabs:
- About: Displays information about the user.
- Projects: Provides a comprehensive list of entities related to them, such as events, bookings, contracts, and invoices.
- Rights: Offers a detailed list of associated rights.
Configure agent premissions
When you are on an agent's profile page, you will notice a "Rights" tab under the banner.
This button allows you to add or remove the agent's permission through a list with slide button.
In the list, you will see the description of the right, which is quite self-explanatory.
Simply click on the slide button to enable or disable the right for the agent.
Event
To create a booking, it is imperative to first create an event, which will consist of a name, start and end dates, country, and description.
You can create multiple bookings for a single event, especially in the case of a festival.
Additionally, you have the option to create a multi-booking for a single event; the choice is yours to make.
Create or import events
To access the Event module, click on the "Event" tab located on the left sidebar under the "Details" section.
You will be redirected to a page displaying a list of your events in list format.
Above the list, you will find two buttons: one for adding an event, which redirects you to a creation form, and another for bulk importing a list of events.

If you choose to import a list of events in bulk, a popup will appear when you click the "Import" button.
It will prompt you to download a pre-filled Excel file that you need to complete with your event's information.
Afterward, simply upload the filled file in the designated area within the popup and press the "Import" button to import your events.
Update an event
When you are on an event's profile page, you will notice an "Edit" button in the top banner.

This button allows you to update the event's information through a form.
Event page
To access the Event module, click on the "Event" tab located on the left sidebar under the "Details" section.
You will be redirected to a page displaying a list of your events in block format.
Then click on the event to access their profile. You'll find a banner with the event's name and the person who created the profile, along with buttons (Edit, Delete).
Below, there are some information and lists:
- Information: Displays description about the event.
- Lists: Provides a comprehensive list of entities related to them, such as events, bookings, contracts, and invoices.
Note: An event can be created by an Agent if you grant them the necessary permissions.
Location
To create a booking, it is imperative to first create a location, which will consist of a name, address, country, and contact's information.
Create or import locations
To access the Location module, click on the "Location" tab located on the left sidebar under the "Details" section.
You will be redirected to a page displaying a list of your locations in list format.
Above the list, you will find two buttons: one for adding a location, which redirects you to a creation form, and another for bulk importing a list of locations.

If you choose to import a list of locations in bulk, a popup will appear when you click the "Import" button.
It will prompt you to download a pre-filled Excel file that you need to complete with your location's information.
Afterward, simply upload the filled file in the designated area within the popup and press the "Import" button to import your locations.
Update a location
When you are on a location's profile page, you will notice an "Edit" button in the top banner.

This button allows you to update the location's information through a form.
Location page
To access the Location module, click on the "Location" tab located on the left sidebar under the "Details" section.
You will be redirected to a page displaying a list of your locations in block format.
Then click on the location to access their profile. You'll find a banner with the location's name and the person who created the profile, along with buttons (Edit, Delete).
Below, there are some information and lists:
- Information: Displays details about the event, map and their calendar.
- Lists: Provides a comprehensive list of entities related to them, such as events, bookings, contracts, and invoices.
Note: An location can be created by an Agent if you grant them the necessary permissions.
Invoice
To create an invoice, you must first have entered your bank information if you are invoicing for your company or the artist's bank information if you are invoicing for them. Additionally, you must have created a contact.
You can create a regular invoice, a credit note, or a replacement invoice.
The company's invoice numbers are formatted as follows: a prefix consisting of the letter F followed by the year and month, for example, F202302, then a dash and an auto-incremented number, for example, F202301-0006.
For draft invoices, the prefix will be PROV followed by a random number.
For artist invoices, the prefix is the letter A followed by the artist's ID, then the year and month, for example, A452020301, followed by a dash and the auto-incremented number.
Note: You can create an invoice directly from the page of a booking. Please note that on the booking page, you can only invoice contacts who have booked on it. To invoice a booking for another contact, you must go through the independent invoice creation page.
Create Invoice
To access the Invoice module, click on the "Invoice" tab located on the left sidebar under the "Details" section.
You will be redirected to a page displaying a list of your invoices in list format.
Above the list, you will find one buttons for adding an invoice, which redirects you to a creation form.

To create an invoice, you need to fill in the form with the invoice type (normal, replacement, credit note), a creation date, a payment due date, the currency of the invoice (£, $, €), you can add a note, your bank account or the artist's bank account, a contact, and optionally a booking (the booking is not mandatory).
Once validated, you will be redirected to the invoice page to create the product lines.
Create Invoice line
After creating your invoice, you need to add the product lines at the bottom of the invoice page.
You can add as many lines as you want, including: a description, an artist, the quantity (stock), price excluding tax, VAT%, and the total price including tax.

When you go to an invoice that doesn't have any lines, you will see an info alert above the invoice banner prompting you to add lines.

Invoice page
To access the Invoice module, click on the "Invoice" tab located on the left sidebar under the "Details" section.
You will be redirected to a page displaying a list of your invoices in block format.
Then click on an invoice to open its page. You will find a banner at the top with various information about the invoice, such as its status, number, type, author, creation date, payment due date, validation date if it has been validated, booking reference if it is linked to a booking, the amount excluding tax, including tax, and the VAT.
There are also a set of buttons: Re-open, only available if the invoice has not been paid and does not have an invoice with a higher number; a Paid button to pay the invoice; a Send button to send the invoice to the contact; and a PDF button to download the invoice in PDF format.

Below the banner, you will find two blocks. The left one concerns the information of the invoice owner (your company or an artist), and the right one concerns the information of the client.
Below, you'll see the different product lines of the invoice.
Send an invoice
To send an invoice, you need to go to the invoice page and click on the "Send" button or use the email icon in the list of invoices.
A popup with a form will appear.
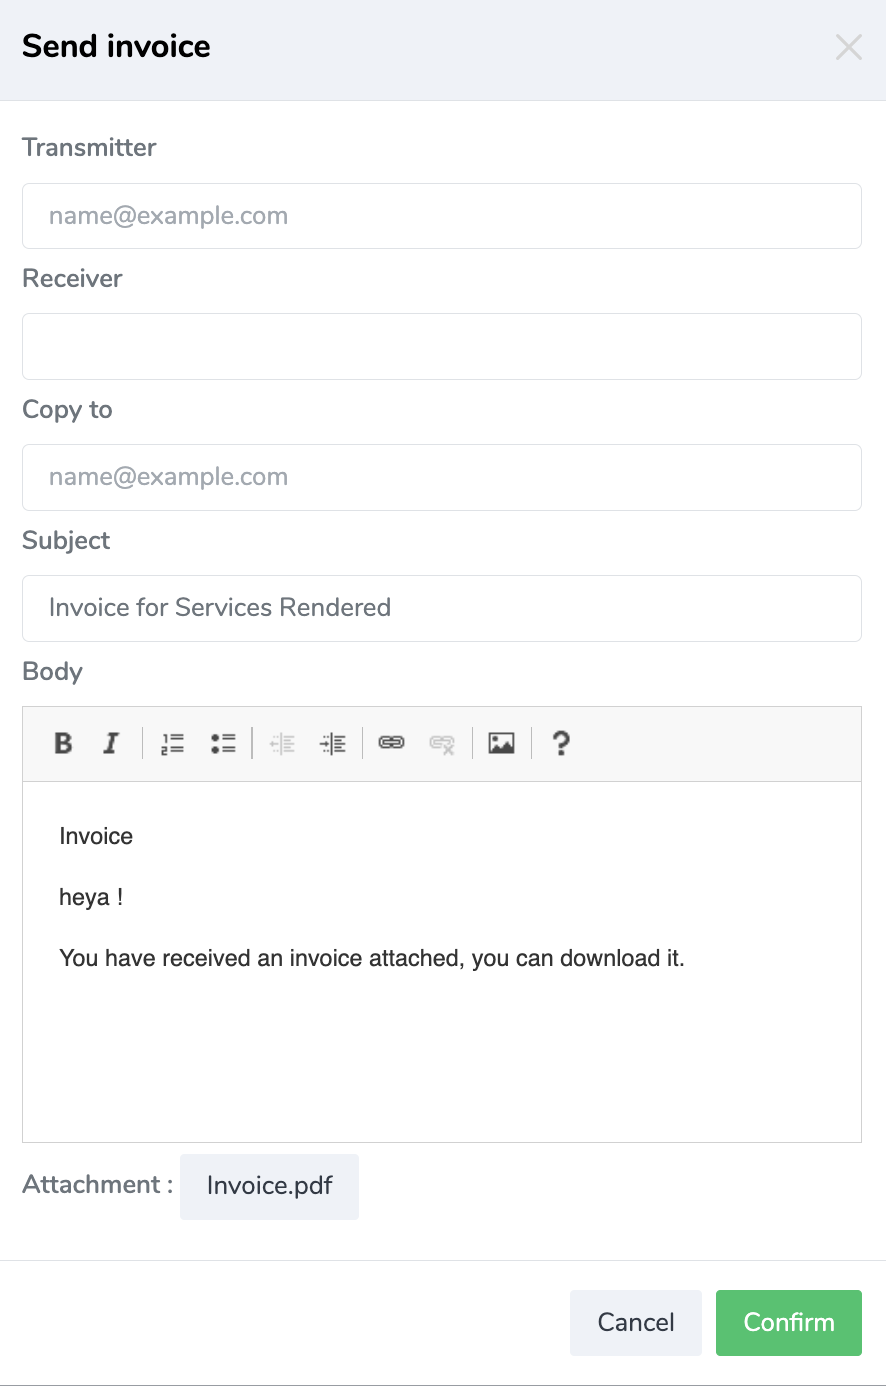
Once the email is sent, the client receives the invoice as a PDF attachment.
You will need to independently manage the payment of the invoice with your client. Once the payment is made and the money is received in your account or the artist's account, you can change the status of the invoice to "paid".
Paid an invoice
To pay an invoice, you need to go to the invoice page and click on the "Paid" button or use the $ icon in the list of invoices.
If you have a booking linked to an invoice, changing the status to "paid" will impact the overall status of the booking.
Fee
Fees are the costs incurred by a booking when considering their settlement, such as flight expenses, catering, etc.
Typically, these expenses are encompassed in the booking invoice and may not necessarily need to be created separately.
Create fee
To access the Fee module, click on the "Fee" tab located on the left sidebar under the "Details" section.
You will be redirected to a page displaying a list of your fees in list format.
Above the list, you will find one buttons for adding a fee, which redirects you to a creation form.

Update a fee
When you are on a fee's profile page, you will notice an "Edit" button in the top banner.

Fee page
To access the Fee module, click on the "Fee" tab located on the left sidebar under the "Details" section.
You will be redirected to a page displaying a list of your fees in block format.
Then click on the fee to access its profile. You'll find a banner displaying the fee's name, description, and the person who created the profile, along with buttons (Edit, Delete). Additionally, there is information on the gross and net amounts of the fee, the creation date, payment date, and the reference of the associated booking.
Contract
Note: Contracts require a booking but can be directly created on the global creation page of a booking.
Create a contract template
To access the Contract module, click on the "Contract" tab located on the left sidebar under the "Details" section.
You will be redirected to a page displaying a list of your contracts in list format.
Above the list, you will find two buttons: one for adding a contract template, which redirects you to a creation form, and another for adding a contract, which redirects you to a creation form.

To create a contract template, you should click on the "Create templates" button, which will redirect you to the list of contract templates.
By default, a contract template is automatically assigned to users. The template models created by default are intended for contracts for artists working in the DJing industry.
On this page, above the list, you will find an "Add contract templates" button that will redirect you to a creation form.

This form includes a general text area that will contain the body of the contract.
Then, there are two text areas that will be integrated into the general text of the contract using the placeholders ([[PROMOTER_SERVICES]] and [[ARTIST_COMPENSATION]]).
Please, if necessary, remember to include these placeholders in the general text area.
These placeholders allow you to add the services to be provided by the promoter (contact) and the compensation for the artist.
To make the contract dynamic for each booking, artist, and contact, you will find on the left side of the form a list of various and varied placeholders.
Note: We recommend modifying the default contract template and/or duplicating it.
Create a contract
To access the Contract module, click on the "Contract" tab located on the left sidebar under the "Details" section.
You will be redirected to a page displaying a list of your contracts in list format.
Above the list, you will find two buttons: one for adding a contract template, which redirects you to a creation form, and another for adding a contract, which redirects you to a creation form.
To create a contract, you should click on the "Add contract" button.
To create a contract, simply click on the "Add contract" button, and you will be redirected to a form.
You need to select a contract template, set a creation date, choose a previously created booking, and specify the services to be provided by the promoter (contact) and the compensation for the artist.
Contract page
To access the Contract module, click on the "Contract" tab located on the left sidebar under the "Details" section.
You will be redirected to a page displaying a list of your contracts in list format.
Click on the desired contract in the list, and you will be redirected to the contract page
At the top, you will find a banner displaying contract information, including the contract status, date of the contract, author, artist, contact, event, venue, and booking reference.
You will also see a set of buttons: one for downloading the contract in PDF, one for signing or deleting the signature, one for sending the contract to the contact who needs to sign it, and one for deletion.

Below, you will find the body of the contract that you can edit directly on this page.
Send a contract
To send a contract, you need to go to the contract page and click on the "Send" button or use the email icon in the list of contracts.
A popup with a form will appear.

Once the email is sent, the contact will receive an email with a link to digitally sign the contract.
As well as the contract in PDF format. Once the contract is signed, the contact will be able to download the signed version.
The status of the contract will change to "signed."
Sign a contract
To sign a contract, you need to go to the contract page and click on the "Signed" button or use the email icon in the list of contracts.
You can also send the contract to the contact via email for them to sign. Refer to the point above in the documentation.
Agent
Agents are generally considered individuals working for you worldwide, finding events on your behalf.
An agent can access the calendar of your events and add events themselves; however, they cannot validate an event.
Only a user can validate an event. You can create an unlimited number of agents.
An agent who has just been created receives an email with a link to activate their account, a company code to connect to the correct company in bookster, and a link to create their password.
An agent can have multiple accounts in different companies on bookster with the same email. The company code will help you connect to the correct environment.
Log in as agent
To log in as an agent, simply click on the login button at the top right of the bookster website.
Then, select the "Log as an agent" button.

A login form will appear, where you need to enter your email, company code, and password.

Once connected, you will be redirected to the dashboard, which includes access to the calendar module and an option to modify your account details and password.
Agent account
Click on your personal icon (initials of your full name or email you've chosen) located in the top right corner.

Then click on the "My Account" button.
You will be redirected to your profile page.
On this page, you'll find a banner with your name, the account creator, your company code, and buttons to edit your information and password.

Below, you'll find two tabs, one to view your information (selected by default) and another that displays the list of your bookings.

Change your personal settings
On your account page, then press the "Edit" button to update your information.
Change your personal settings
On your account page, then press the "Edit Password" button to update your password.
Dashboard - Calendar
As an agent, you only have access to the calendar module to create bookings.
The calendar is the central module of your application, providing a quick and clear overview of your bookings.
You can filter by artist, view by year, month, week, or day. Additionally, you can swiftly add note-type events or bookings to your calendar.
Note: Each event on the calendar displays the event name and the artist's name. For privacy reasons, we have not displayed the text in this example.
Each event is represented with a color on the calendar corresponding to the color of the booking's workflow status or the event note :
- Yellow : To be confirmed
- Blue : Option
- Green : Confirmed
- Red : Canceled
- Grey : Info Note
- Orange : Artist unavailable
You will also notice that on certain events, there is a small round badge in the upper-left corner.
This badge corresponds to the overall status of the booking. For a booking to be considered complete, both a signed contract and a paid invoice are required.
As soon as a booking is incomplete, a badge appears even if it has been confirmed.
If you click on the event in the calendar, a popup will appear with several details.
Create a booking
To create a booking, simply click on a date. A popup will open containing a booking creation form.
During the booking creation, if you have multiple artists performing on the same night at the same event, you can add all the artists in the selection list.
The software will handle the creation of a multi-booking.
As an agent, you can only create a booking with the workflow status "To be confirmed" or "Option."
Note: To create a booking, you must have previously created at least one artist and one contact; the event and the venue can be created on the fly. As an agent, you cannot create contacts. You will need to inform a user from the company to add a contact if it does not exist.
Show booking and update the booking workflow status.
In the calendar, to view the information of a booking, simply click on it.
A popup with the details will appear, containing important information about the booking, such as the artist, event name, venue with a map, various files, and most importantly, an editable field containing the workflow status of the booking.
To update it, you only need to modify it via the selector.
As an agent, you can only create a booking with the workflow status "To be confirmed" or "Option."
Next to the date, you will see the overall status of the booking, indicating whether the booking is complete with a signed contract and a paid invoice.
Once a booking is confirmed or canceled, you won't be able to change its workflow status.
Note: Only a user can confirm an event; agents cannot confirm an event or modify the workflow status of an event that is not theirs.